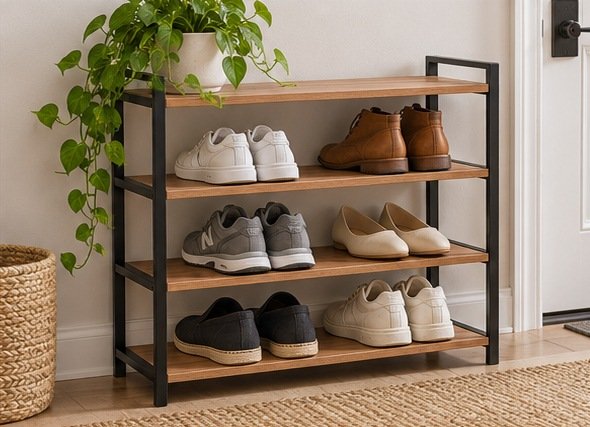
A small entryway needs a shoe rack that keeps shoes easy to reach and leaves the route clear when doors are open. Measure depth with the largest pair in place. An open rack is practical for frequent use and a shallow cabinet can keep less-used pairs visually out of the way. The right capacity is the number of pairs that regularly need to wait by the door, with enough height for your tallest shoes.
Measure the path and door swing
Measure the wall where the rack could sit, then open the front door and any nearby closet door fully. Check for trim, a raised threshold, or a heater that limits usable depth. Look at where people naturally step to remove shoes and what happens if two people enter together. A rack may fit against the wall yet force users to stop inside the door's sweep. Fold a piece of cardboard to the proposed depth and test the arrangement at the time of day when the area is busiest.
Include the actual shoes in the measurement. A short slatted shelf can work if your shoes remain supported and their toes don't project into a walkway. Boots can stick past a rack even if narrower shoes fit. A cabinet has an extra set of clearances as its flap or drawer opens. Mark that depth separately. If the room has a small mat, note whether it will move away from the location or sit under the shelf, and check whether the rack stays stable on a suitable level surface.
Count pairs by size and frequency
Set out the everyday pairs rather than calculating capacity from everything in a closet. Put them in the orientation you would use by the door and measure combined width. Adult boots, children's sneakers, and heeled shoes occupy very different spaces. Count usable shelf width between the side parts and leave room to grasp a pair when neighbors are still in place. An advertised pair count is a useful estimate when it matches the footwear shown. A particular rack can hold fewer pairs in your household.
Reserve one suitable space for taller footwear or check whether shelf spacing is adjustable. In a wet-weather season, you might have bulky pairs that won't fit on extra levels bought for ordinary shoes. A separate tray can give those pairs their own reachable place. For guests, leaving one open shelf at an easy height may suit the routine better than adding a permanent unit solely for occasional visits. Decide what should move to longer-term storage before using every inch of the entryway.
Compare open shelves and shallow cabinets
Open racks are easy to reach and leave shoes visible. Compare the front edge and spacing between bars. A flat shelf can support small heels or narrow soles more evenly than a wide gap between rails. Slatted surfaces give you a direct view of what needs attention below. Think about whether dirt and moisture will fall onto lower shoes or flooring, and provide an appropriate washable spot for wet pairs. IKEA's GREJIG rack is an example of a compact open shelf whose dimensions you can compare against an actual entryway.
A shallow tilt-out cabinet can look tidy and make good use of a wall. Check the inner depth of each compartment and the sizes the cabinet supports. A large or unusually bulky pair can keep the door from closing. Verify installation instructions, including any anti-tip fastening or wall requirements. Do the same with tall stacked racks. Compare how the unit handles more frequent opening, and reserve a separate place to let footwear dry when the cabinet isn't the right spot for wet shoes.
Check cleaning and assembly
A metal or plastic rack can be straightforward to wipe if its corners and interfaces are accessible. A tray or board under the unit might protect the floor in some arrangements, provided it does not make the base unstable. Check the finish for the use you expect and follow the cleaning directions. A closed unit can conceal dust until it collects in a narrow hinge area. Try to see how easy it is to move or lift a shelf when you want to clean it.
Pay attention to stability during installation. Select a floor surface allowed by the maker and follow instructions for stacking or mounting. If you buy a modular set, verify how the upper and lower parts attach. A narrow tower may be useful for infrequent footwear if the access at the top suits people using it. Place commonly used pairs low enough to reach easily and avoid using a shelf as a seat unless the maker specifically designed and rated it for sitting.
Try the arrangement for a normal week
Assign one easy shelf to the pairs that usually land closest to the door. Keep rarely worn pairs elsewhere. Check whether a person can independently remove and return their shoes without displacing another person's. Pay attention to the route at night or when someone is carrying a bag. The right position might be farther along the wall, even if the rack can stand much closer to the door. A short unobstructed step can be worth more than the convenience of getting a shoe from exactly where you take it off.
After a rainy day or a large gathering, notice where the excess shoes end up. If the same pair never fits, change the shelf spacing or reserve a tray before deciding to buy more capacity. When several different sizes use a rack, label shelves by person only if it solves a recurring mix-up. Leave one realistic space for temporary shoes. A setup is easier to keep orderly when someone can put a pair away without first rearranging the rest of the row.
Make space for the footwear that won't fit
Think of rain boots, slippery soles or shoes that need to stay apart. A compact rack can work better with a separate low tray than with more shelves that block the doorway. Measure the tray as part of the entire entry layout. Put the largest dry pair on the shelf first, then see how much room is left for other shoes. Check whether the manufacturer provides usable load limits for stacked or wide shelves, and use them as directed.
Near a narrow door, compare two separate low units with one long shelf. The units may fit around obstacles and make floor cleaning easier, while a long shelf can use more of an uninterrupted wall. Leave enough space to pull a shoe straight out. The area should still work when someone has already left a bag or basket where it usually lands.
Related guide: Read the companion buying guide.
Reference: See the source and specifications.
Frequently asked questions
How much depth should I allow?
Measure your longest pair and the clear area beside the rack with doors open. Add space for any drawer, flap, or projecting shoe.
Is a shallow cabinet better than an open rack?
A cabinet hides shoes and can be helpful in narrow areas if it suits the shoe sizes. An open rack is easier for frequent access and allows a simple place for each pair.
Can I add extra shelves later?
Check whether the exact rack is designed to stack or extend. Follow its assembly and securing requirements and check access after increasing the height.