A good kitchen timer takes only a moment to set and can be seen or heard from where you cook. Pick a simple single-channel timer if you mainly want to track one dish. Choose independent channels if you routinely juggle two pans and an oven. Before paying for extra modes, check the display angle, alarm behavior, and where you can place it without knocking it over or leaving it near hot cookware.
Count the jobs you actually time
Write down the steps of a meal you cook often. Include actions such as turning a pan, draining pasta, resting a roast, or adding a second ingredient. A simple countdown works if the steps run one after another. If three clocks routinely overlap, look for multiple timers you can run and identify independently. Verify that each channel can be stopped or cleared without touching the others. A screen that shows all active channels may be more useful than one that rotates through them, especially when two dishes finish close together.
A single timer can work well if the oven already counts down while you use a separate device on the counter. Decide which action needs the clearest reminder. You may want the loudest timer for a task that has you walking into the dining room, or a quieter one for a meal prepared beside someone working. Make one change to your present routine before choosing extra hardware. If two identical clocks leave you guessing which is ringing, labels or distinct tones can help.
Check how quickly you can enter a time
Try setting examples from your kitchen, such as 30 seconds for a small step, five minutes for a pot, and a longer setting for something in the oven. Direct minute and second controls are convenient for short intervals. A numeric keypad can make longer entries easier, provided the buttons are distinct. Some devices use a dial that accelerates when turned quickly. Test whether you can make a one-second correction without overshooting or clearing the time. A simple input sequence matters when your hands are covered in flour or you're already watching a pan.
Check pause, reset, and memory behavior. A memory feature can restore a frequently used duration. Taylor's memory timer illustrates that approach. Find out whether it recalls the last entered value, a saved preset, or a default. If you use the same interval repeatedly, count the button presses between one alarm and the next start. On a shared timer, compare how easily a second person can tell whether a number is a countdown, a clock, or a previous time that has yet to start. Visible indicators can avoid repeated checking.
Choose a usable alarm and screen
Decide where you need to hear the alarm and whether music or a running fan will compete with it. A steady alarm of useful duration can help when you're across the room. A brief beep may work well on a quiet countertop but be easy to miss if you are hosting. If the listing describes adjustable sound, check the levels and whether the device remembers one after new batteries or a power cycle. A visual indicator may be useful when you are close to the timer, especially if you prefer a lower sound setting.
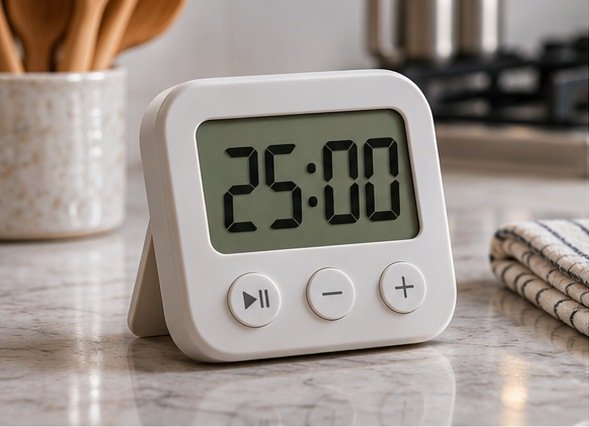
Measure the likely viewing distance. Digits that look large in an online image can be hard to read behind a bowl or at a sharp angle. Check which digits remain large when all channels are shown and whether the backlight stays on long enough to read them. A matte area around the screen can improve visibility under ordinary kitchen lighting. If you mount the timer on a refrigerator, check the angle from the usual working position rather than reading it face on at the store. Make sure each active channel is distinct enough to interpret at a glance.
Check mounting, cleaning, and power
A folding stand works on a shelf, while a magnet can put a timer close to eye level if the surface is suitable. Confirm that a magnet will hold on the exterior surface you have in mind. Check that buttons can be pressed without pushing the device away and that nearby cupboards clear the body. If a hanging hole is the only support, consider how much the timer moves when you set it. Read the operating conditions and keep it away from splashes or heat unless the maker expressly supports the location.
Check the battery size, access cover, and replacement instructions. Some timers reset their preferences after a battery change, so retain the manual. Think about how often the face needs to be wiped and whether gaps around the buttons collect residue. A smooth face can be easy to clean, but the manual tells you which areas and cleaners are suitable. A timer stored near the stove is convenient when it sits outside the cooking area and can be reached without stretching over other work. Pick a stable resting place where it won't be swept into the sink.
Try a normal dinner before relying on it
Run one short duration and one longer duration as in a normal cooking session. Decide where you will hear or see the signal and who should acknowledge it. If you use two channels, stop them in the order they normally finish and see whether the controls make the active channel obvious. Keep timers separate from measurements that a recipe or food guidance calls for. A countdown can remind you when to check what is cooking, while a suitable thermometer may be needed to check the food itself.
If you share the kitchen, put the timer and its most-used settings where everyone can find them. Reserve visible channel labels for jobs that routinely overlap. Labeling a channel by appliance can work where the roles rarely change, while a short note beside the cooking area can make sense for one complicated meal. Compare how many times you consult the timer and whether you can do so without handling it. A dedicated model earns its space when setting and checking it fits into the cooking rather than interrupting it.
Decide what needs its own physical button
Compare what happens if you start the timer with a previous value still displayed. A start control should be easy to distinguish from cancel, especially when you set several intervals in quick succession. If a device uses one key for both jobs, check how it makes the current state visible. A loud signal is of little use if you never started the countdown. Look for a clear active indicator and try glancing at it from where you normally stand.
For a routine with long waits and short steps, check both ends of the timing range. Some appliances already cover long durations, so a small timer with a quick seconds control may be enough for the remaining job. Decide which measurements need to remain visible while other kitchen work continues.
Related guide: Read the companion buying guide.
Reference: See the source and specifications.
Frequently asked questions
Can a phone replace a kitchen timer?
Yes if it works for your routine. A dedicated timer can be useful near the cooking area or when more than one cook needs access to the same countdown.
Do I need a stopwatch as well?
Count-up is useful when you want to record elapsed time. For reminders at a planned interval, a readable countdown is enough.
Does a mechanical dial need batteries?
Many spring-wound timers use a mechanical bell without batteries. Check the manual for winding, supported timing range, and alarm behavior.