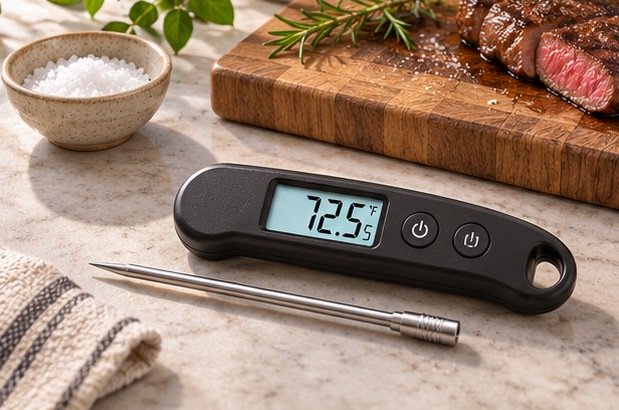
Choose an instant-read thermometer with a narrow sensing tip, a screen you can read from your usual cooking position, and a probe long enough to reach the center of the thickest food you make. Speed matters most if you cook thin cuts or check several portions on a hot grill. For an occasional roast, probe reach and readable digits are likely to matter more than shaving a second off a specification.
Pick the probe for what you cook
A thin probe enters a small piece of food with less disruption and makes it easier to approach the center from the side. It also helps when checking several individually portioned items, where a broad stem can be awkward to place. Look up where your candidate actually senses temperature. A sensing zone at the tip behaves differently from one that needs a longer section of the probe immersed. The instructions should tell you the minimum insertion depth. A pointed tip alone does not tell you the length of the sensing zone.
For a large roast, check the usable exposed length of the stem. Some handles sit close enough to the pan that the advertised overall length gives a misleading impression of reach. A folding probe lets you vary the angle and stores neatly, but the hinge needs clearance to swing open. A straight probe with a removable sheath can be easier to slide into crowded areas. Make sure the sheath stays on in a drawer and comes off without gripping near the sharp end.
Compare response time and accuracy separately
Response time describes how quickly a probe approaches the temperature of the material around its tip. Accuracy describes how closely the final reading matches the actual temperature. A thermometer can be quick and still have a wider stated error band than another model. Consult the range over which the quoted accuracy applies. A reassuring number printed on a package may cover only a limited band of temperatures.
Different makers time their instruments under different conditions. A probe tested in moving water can behave differently in a piece of food. In practical terms, a quick model gives you more time to move the tip slightly and see whether you've reached a cooler section before you return the food to the heat. If you cook small batches at a counter with good lighting and plenty of room, paying a premium for the smallest advertised response time is harder to justify. A clear display and repeatable handling can save more time than the number on the box.
Choose controls you can read while cooking
Backlighting helps on a dark patio, but it has to activate when you need it. A dedicated button gives predictable control. A motion-activated light or automatic rotation may be easier if you regularly switch hands. Check product photos with the probe folded and extended. A display that reads beautifully in a listing can end up upside down when you approach a pan from your preferred side.
Check whether the thermometer remembers Fahrenheit or Celsius after battery replacement. Think about where the power control sits when your thumb is on the handle. On some folding designs opening the probe wakes the instrument, reducing button presses. On others an easily bumped button can change units. If you use glasses for close reading, prioritize digit size and contrast over decorative screens. Readability is especially important when you are moving between a bright kitchen and a dim grill area.
Think through cleaning and maintenance
The probe touches food and needs to be cleaned between uses according to the manual. An ingress-protection rating can help you compare housings, but the manual is the better source for what parts you may rinse and whether immersion is permitted. Check for a large seam around the folding hinge or a recess where residue can collect. A handle you can comfortably hold away from the area you're cleaning is easier to manage over the sink.
Look at battery type, the closure on the battery door, and whether it takes a special tool to open. Models with a common replaceable battery can suit someone who uses the thermometer infrequently and wants to get it working in a hurry. Check the manual for a supported verification or recalibration routine. An ice-water check can flag a problem around freezing when done correctly. It doesn't establish accuracy across the cooking range, so contact the manufacturer if the display remains inconsistent or the probe has been damaged.
Match the thermometer to your cooking routine
For thin chops, burgers, or small fillets, prioritize a fine sensing tip over a long handle. The USDA's guidance on checking food temperature emphasizes correct placement. For thin items, getting to the center often means approaching from the side. For thicker items, follow guidance for the particular food and avoid resting the tip against bone or other areas that won't represent the center. Check more than one piece if the portions vary in size or if the heat across the pan is uneven.
For slow roasting, decide whether you want occasional spot checks or continuous monitoring. An instant-read model is a handheld tool for spot checks. Where continuous monitoring is the priority, look at an oven-rated leave-in thermometer with a suitable cable or another design explicitly rated for that use. Some households benefit from both because a fixed probe monitors one location and a handheld tool can check other portions before serving. If you buy only one, choose for the situation that causes you to open the oven most frequently.
Before buying, make a list of the three foods you check most often and describe how you'd reach their centers. Then look up sensing depth, probe length, display orientation, stated accuracy, and washing instructions for each candidate. These five details tell you more than a shelf full of modes for presets you may never use.
Check the display under your real lighting
If you compare two candidates in person, hold them at the angle you use over a stove and under direct light. Look for reflections that hide the last digit and check whether the screen stays on long enough to move the probe between portions. A layout that is easy to read while stationary may be awkward when your free hand is holding tongs. Choose the configuration that lets you keep that hand steady.
Related guide: Read the companion buying guide.
Reference: See the source and specifications.
Frequently asked questions
Is a long probe always better on a grill?
Reach comes in handy over a broad grate, but handling and insertion angle still matter. A very long stem can be clumsy when checking thin food on a small stovetop pan. Look for enough length to reach comfortably while keeping the tip under control.
Is an infrared thermometer an equivalent substitute?
Infrared models measure surface temperature. A probe reaches the interior, which makes it the appropriate tool when a recipe or food-safety guidance calls for checking internal temperature. Both can be useful when used for their separate jobs.
Can I leave an instant-read probe in the oven?
Follow the manufacturer's stated limits. Most handheld instant-read tools are designed for brief checks, so choose a model specifically rated for continuous oven use if that's how you intend to measure.
Which should I prioritize on a tight budget?
Start with an easy-to-read screen, a fine tip with clearly documented sensing depth, and a stated tolerance in the range you use. Then choose between shorter and longer stems based on your cooking equipment.