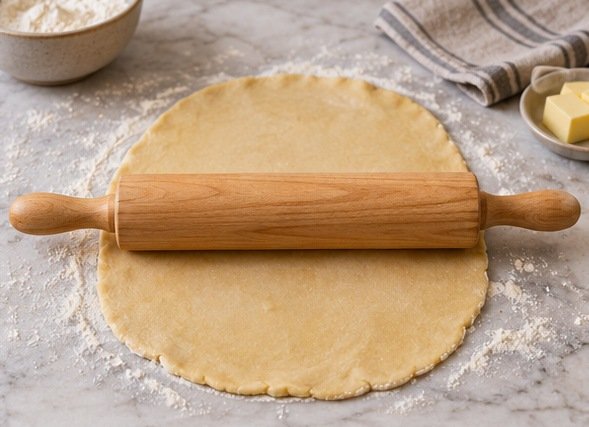
A straight rolling pin is a good starting point for cookie dough and sheets you want to roll evenly. A tapered pin is easier to steer when you often make round pie crusts. Handles can help you keep your fingers away from the dough, while a solid handleless barrel gives direct control over pressure. Choose by working width and grip before deciding on material.
Start with the dough you make most
For a pie crust, use the diameter of your usual pie plate and the recipe's target size to picture the finished circle. Leave enough room to turn the dough and move the pin around it. A tapered end lets you shift pressure toward one part of the dough, useful if a round keeps developing a thick spot. A long uniform cylinder can still roll a circle, especially if you rotate the dough between passes. The shape matters most if you roll often enough to notice where you need more control.
For cookies, a straight barrel can cover a good portion of the sheet and makes it easier to compare thickness from side to side. Ask where the dough will rest and how you lift it or cut it afterward. A pin wider than your board has value only if the edges have enough room and are kept clear. A narrow barrel can be better for small sections even when your recipe makes a large batch. You can split the dough, roll one section, and keep the rest aside as the recipe directs.
Compare barrels and grips
A French-style pin usually has no separate handles. It may have tapered ends or a fairly straight profile. You can spread your hands across the barrel and adjust pressure directly. Check whether the tapered sections reduce the part you can use to support a broad sheet. A simple dowel offers a long uniform contact area but needs space for your hands. King Arthur's rolling pin collection shows several of these forms. Compare individual dimensions rather than choosing by the name alone.
Handled pins usually have a barrel that turns separately from the grips. Some bakers find that motion easier to repeat. Check whether the handles fit your hands, let your knuckles clear the counter, and leave enough room to turn in your work area. The outside length includes the handles and may overstate what you can roll in one pass. A tight spot beside a mixer might accommodate the barrel but stop your hands. If you share the tool, let each baker try the grip or compare it with a familiar object before ordering.
Assess weight and surface
A light pin can be easy to steer and lift between passes. A heavier one may help apply steady pressure to firm dough but can feel clumsy when you want only a small correction. Think about how you start with chilled dough and how you handle it near the final thickness. Check the manufacturer's care instructions before deciding whether you want wood, metal, or another surface. Different finishes can respond differently to cleaning and repeated handling.
If you are drawn to a chilled pin, check whether the manufacturer supports chilling it, and consider whether you have room to put it there. Dough temperature and the recipe still influence sticking and handling. A lightly floured pin or a rolling method that uses suitable sheets can help when the recipe calls for it. The pin cannot substitute for the dough's preparation and rest steps. Look for a surface you can clean and dry easily so the right tool is available for the next batch.
Decide whether guides would help
Spacer rings can set height at the ends of a compatible straight barrel. Check the included sizes against the thicknesses your recipes call for. Both rings need a suitable surface to ride on, so measure the working width between them and the size of your board or mat. Rings may not fit a tapered or differently sized pin. If you sometimes roll to another thickness, check how quickly they come off and whether replacements are available.
Separate guide strips can be handy if you use more than one rolling pin or want the full barrel surface between the edges of the dough. Set them up so the barrel reaches across both sides without losing contact as you work. Remember that a thickness guide helps at the last few passes, after you have spread the dough into a manageable shape. For recipes where precision is less important, a ruler at a few spots may be enough. Choose a guide system if it replaces a regular interruption in your work.
Plan the full counter workflow
Draw a rectangle around the space where you roll. Walk through steps such as dividing the dough, turning a crust, storing cutters, and moving finished pieces to a sheet pan. A long pin can work beautifully in an open kitchen and feel awkward if it always clips the back wall. Put a similarly sized item on the counter to approximate the fit. Decide where it rests between passes so it does not roll into the flour or off the edge.
Read care guidance for the barrel, axle and grips separately. Some pins need a wipe and dry, while others can tolerate different treatment. Check joints where residue can collect and confirm whether they need to remain dry. For a fixed dowel, a drawer or holder that prevents rolling is useful. For a long or heavy pin, choose low, secure storage that stays easy to reach during preparation.
Test on a familiar recipe
Roll the same dough you know, using the thickness and rest instructions you normally follow. Look at whether the pin drifts, sticks, or creates thin edges before the center is ready. Make a few shorter passes and check the thickness across different spots. If you have to adjust often, notice whether you are repositioning the dough or correcting the tool's path. A simple change in counter layout may solve access problems without changing pins.
Clean the pin and put it away before making a final comparison. A tool that produces a neat crust but takes several extra steps to wash or retrieve may be less useful for frequent batches. If two people make different recipes, record which pin or ring setup works for each. Check the actual shape and finish periodically. The best rolling pin is the one you can control for your regular baking and keep ready for the next session.
Compare width with the recipes you repeat
Put your usual cookie cutter and pie plate beside the board before taking measurements. You may find the work is limited more by space to move the cut pieces than by how wide you can roll. Size the pin so you can finish a pass and pick it up without moving the tray. If you work on a small table, a compact pin that gives you room to turn the dough is often easier to use than a wide pin that requires you to move everything before turning.
Related guide: Read the companion buying guide.
Reference: See the source and specifications.
Frequently asked questions
Is a heavier pin better for pastry?
Weight can make firm dough easier to press. A lighter pin can be easier to steer when you need to correct thickness or work near a thin edge.
Should a first rolling pin have handles?
Try the motion with your usual work height. Handles can make a steady forward pass comfortable; a solid barrel gives you direct control over pressure.
Can one pin roll both pie crusts and cookies?
Yes. A straight pin is versatile for sheets, while rotation and careful pressure help when making a circle. Choose a width that fits both jobs.